As this year has elapsed, one of the interesting things that I’ve observed is the increased number of IoT products that are focused on consumers. It’s exciting that now it’s not that expensive anymore to get real-time data about your home anywhere, anytime. And, there is more to come, especially for those of you who would like to optimize energy consumption in your home. Examples of companies that work on this are Greenely and Watty.
All of these products are very well made and have a user-friendly interface. However, the aim of this post is to look at how you can create a simple system on your own.
Idea
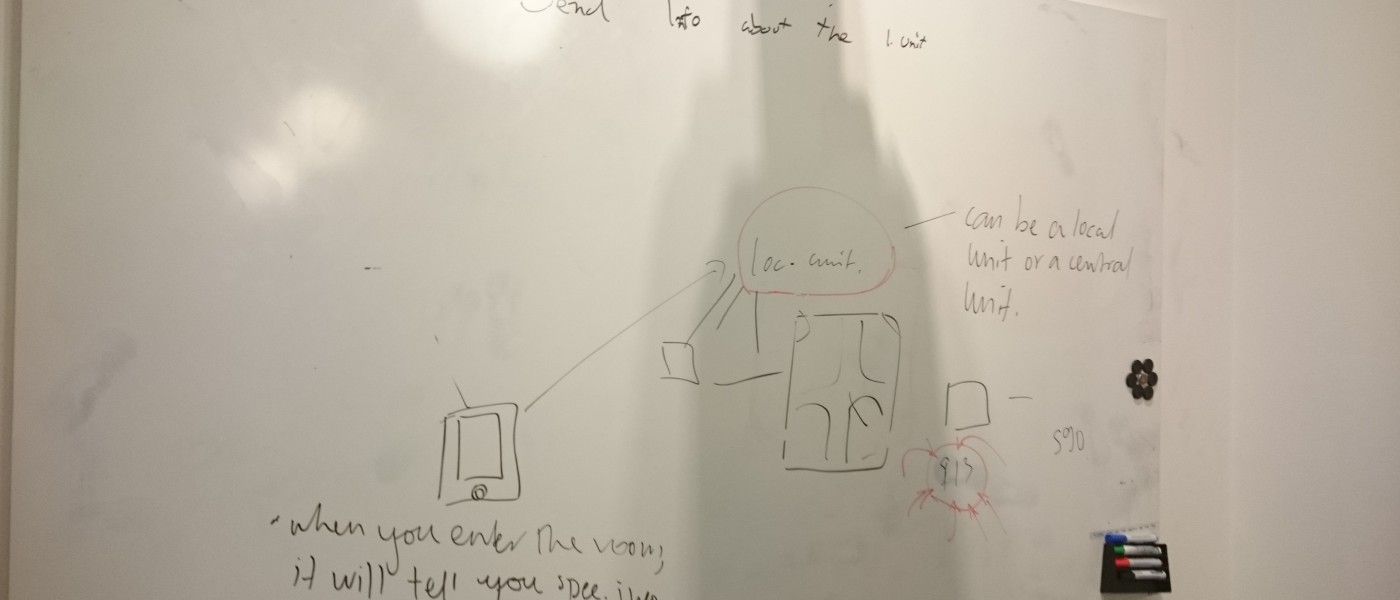
Throughout this year, I, together with my classmates, were able to test one possible design of such a system, which requires two main components: one that acts as a server and another that acts as a client. Of course, it’s possible to have one unit (both a server and a client) too, but once you add more units, the first design choice seemed easier.
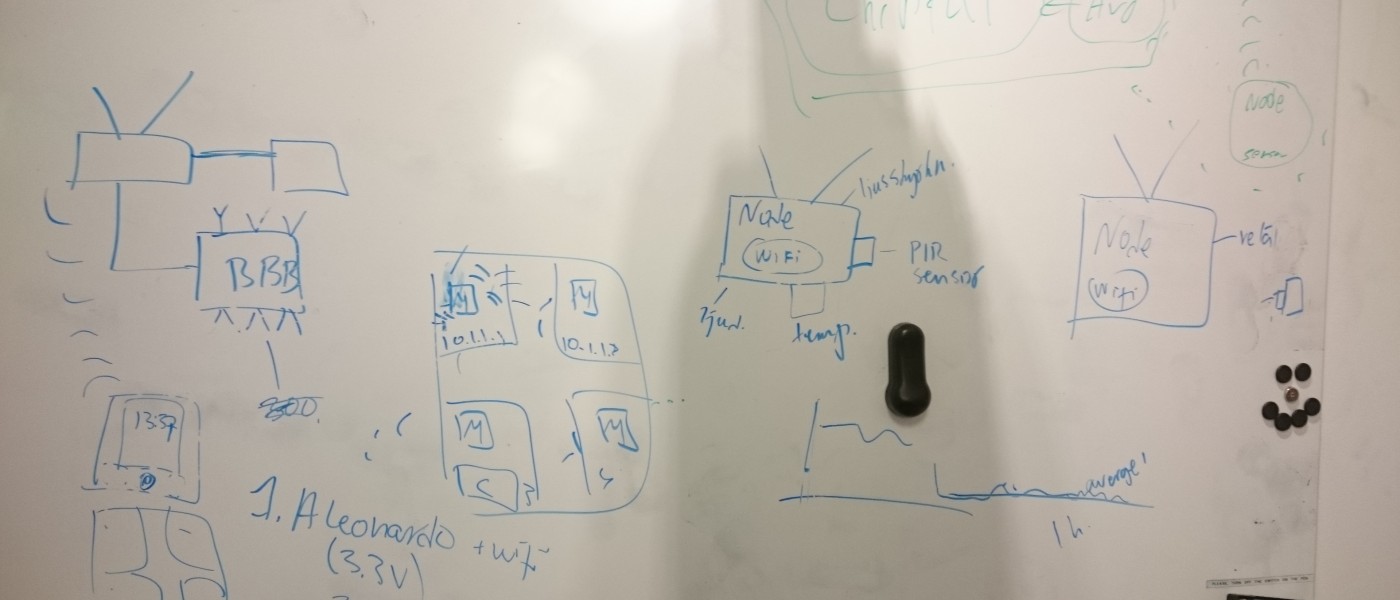

The server’s primary function is to collect information from the clients, process it and return it in the form of a graphical user interface (on the Web), or alternatively send the data to a mobile app once requested.
The clients are responsible for collecting various kinds of information, such as movement, temperature, and humidity, and send that off to the server.
Implementation
Once we’ve sorted out the modules we need, the tricky question is the implementation. Some of the questions that I worked on was the type of hardware and the communication. Here’re some ideas:
- Server: BeagleBone Black/Raspberry PI. Client: Arduino with WiFi shield.
- Server: BeagleBone Black/Raspberry PI. Client: Arduino with Radio receiver and transmitter.
- Server: BeagleBone Black/Raspberry PI. Client: NodeMCU.
- Server: NodeMCU. Client: NodeMCU.
All of these should work, so the next question is of economical nature. Throughout the year, all of us realized that the first solution was too expensive. Getting an Arduino with a WiFi shield is like getting an Arduino with an Ethernet shield combined with a cheap router. However, I tried to order a Chinese version of the Arduino WiFi shield (from eBay), at the tenth of the cost of the genuine version. It was delivered but did not work. The Radio receiver and transmitter solution was a bit more fortunate, but within two days it broke too (it was also a Chinese version). Alternatives 1-2 failed, so, the NodeMCU was chosen instead.
Why NodeMCU
The great thing about NodeMCU in my mind is the that it is adjusted to IoT projects: it’s both cheap, powerful and simple to use. The development version costs ca. 250 SEK (approx USD 30) in Sweden, but you can probably get it for a cheaper price somewhere else. Note, once you are ready, you can decrease the costs if you get just the esp8266 12e version, which should be even cheaper.
Getting Started
You can think of NodeMCU as an Arduino with a built in WiFi module. In fact, you can use the same Arduino IDE with the NodeMCU package. These are the steps:
- Open Arduino IDE, then File > Preferences.
- Where it says additional boards manager, insert the following link: http://arduino.esp8266.com/stable/package_esp8266com_index.json
- Open the board manager inside Tools menu and install the esp8266 package.
The step by step discussion of how to start writing code is not described here, so I assume that you’ve already done some Arduino programming. If not, I would recommend reading a booklet (in Swedish) here.
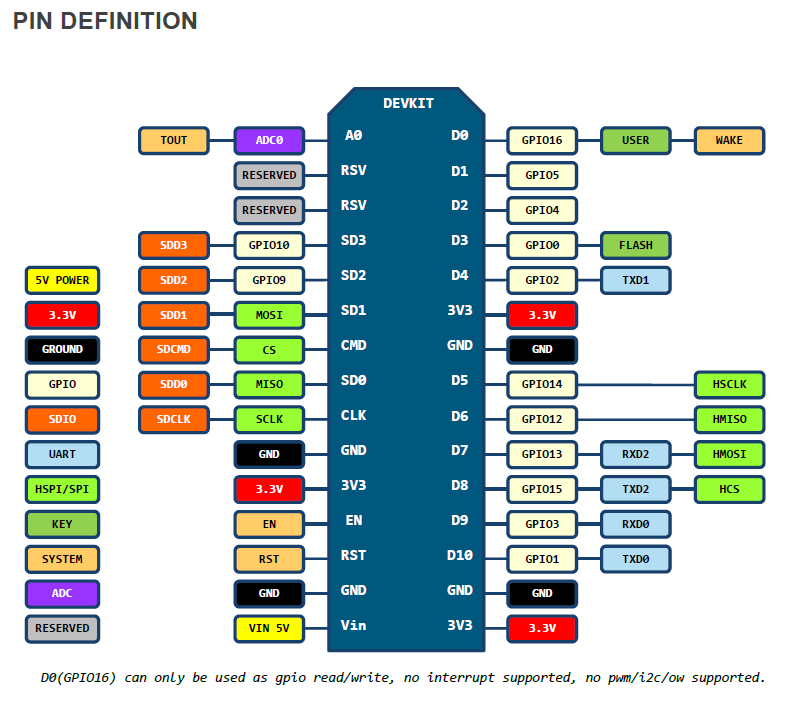
For those who’ve already done some Arduino programming, I would recommend to keep in mind that when you refer to various pins, for instance in digitalWrite, it’s import to keep in mind that the first pin is not referred to as “1”, but as “5”, or, if you have the package installed, as “D1”. Here’s a short overview:
Results
Assuming that we got our first Hello World program working, we could easily add a motion detector to the Arduino. The code for the motion detector is based on Kristian Gohlke’s code. The final setup could look as shown below:
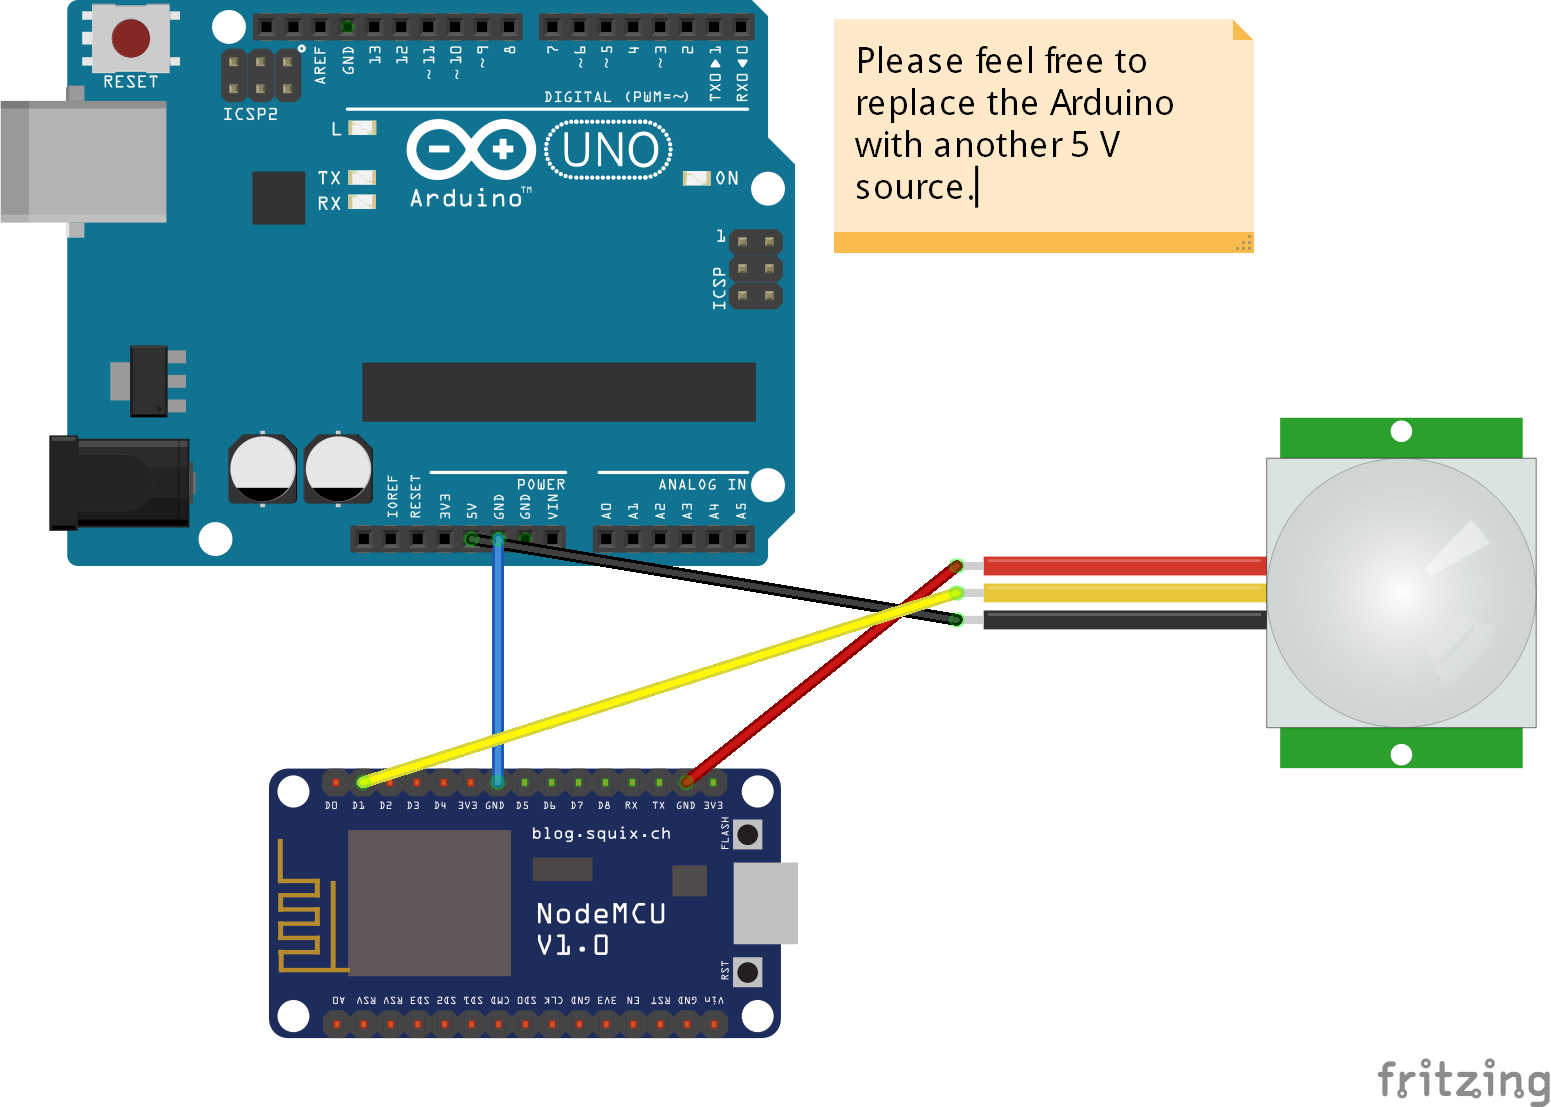
Note, the Arduino is there to provide a 5V source, however, you could always replace it by a cell and a voltage step down component, if necessary. Almost all of the code can be found here.
Conclusion
When considering to build a smart home system, it’s important to have cheap, simple, and powerful components. Based on this project, we came to the conclusion that NodeMCU met all of these requirements.